Laravelでエクセルをインポート・エクスポートする方法を知りたい、できれば簡単に。という方に向けた記事になります。
開発業務の中でエクセルを使う機会があったので、インポートとエクスポートの方法を勉強したのでメモ。
環境
・PHP 8.0.8
・Laravel 9.14.0
・Docker 20.10.17
maatwebsiteとは

Laravelで簡単にexcelを操作するためのライブラリ。
このライブラリの機能のひとつにインポート、エクスポート機能があります。
公式サイト
https://docs.laravel-excel.com/3.1/getting-started/
maatwebsiteのインストール・設定
1.maatwebsite/excelをインストール
以下の記事に詳しくまとめました。
2.configファイルに記述
ディレクトリ app/configのapp.phpに以下の内容を追記。
Maatwebsite\Excel\ExcelServiceProvider::class,次に、Aliasの項目に以下の内容を追記してください。
'Excel'=>Maatwebsite\Excel\Facades\Excel::class,3.設定ファイルの作成
以下のコマンドを実行し、excel用の設定ファイルを作成します。
php artisan vendor:publish --provider="Maatwebsite\Excel\ExcelServiceProvider"app/configにexcel.phpが作成されています。
Excelファイルのインポート
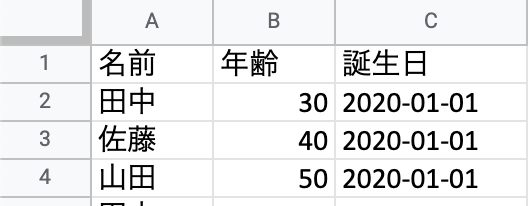
実際に以下のExcelファイルをインポートしてみます。

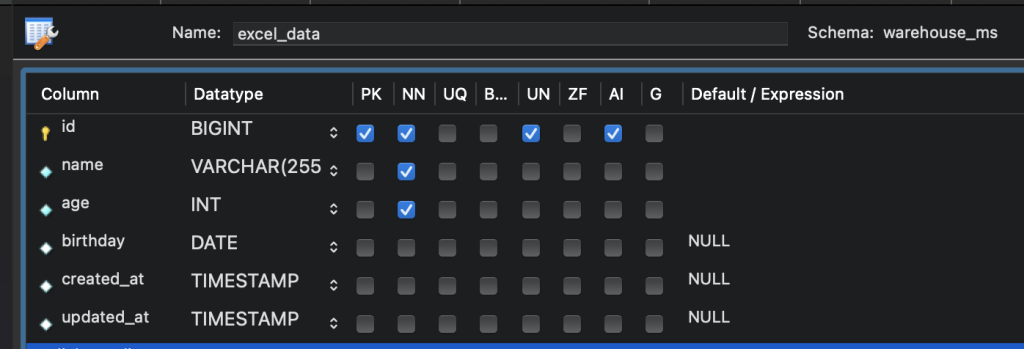
1.データベースの作成
まずは以下のコマンドでモデルとマイグレーションを作成します。
php artisan make:model ExcelData -m次にdatabase/migrationsの中に作成されたマイグレーションファイルに以下の内容を追記します。
Schema::create('excel_data', function (Blueprint $table) {
            $table->id();
            $table->string('name');
            $table->integer('age');
            $table->date('birthday');
            $table->timestamps();
        });
以下のコマンドでマイグレーションを実行。
php artisan migrateデータベースにテーブルが作成されているか確認。

2.ルート設定
表示用・インポート用・エクスポート用のルーティングをweb.phpに記載。(エクスポートは記事後半で解説しています。)
//エクセル用のルーティング
Route::get('/excel', 'App\Http\Controllers\ExcelController@excel')->name('excel');
Route::get('/excelExport', 'App\Http\Controllers\ExcelController@excelExport')->name('export');
Route::post('/excelImport',  'App\Http\Controllers\ExcelController@excelImport')->name('import');
3.ビューファイルの作成
resources/viewsの中にexcel.blade.php を作成します。
<form action="{{ route('import') }}" method="POST" enctype="multipart/form-data">
	@csrf
	<div class="form-group">
		<input type="file" name="file">
		<br><br>
		<button class="btn btn-success">Excelインポート</button>
        @if (session('importMessage'))
        <div class="alert alert-success text-center">
            {{ session('importMessage') }}
        </div>
        @endif
	</div>
</form>
セッションでエラーメッセージを表示できるようにしています。不要であれば削除してください。
4.インポートファイルの作成
以下コマンドでインポートファイルを作成します。
php artisan make:import ExcelImport --model=ExcelDataapp/Imports にExcelImport.phpファイルが作成されます。
5.ヘッダーの設定
ヘッダーを含める場合、ExcelImport.phpの先頭に以下を追加。
use Maatwebsite\Excel\Concerns\WithHeadingRow;クラス名の最後にも追加しましょう。
class ExcelImport implements ToModel,WithHeadingRowさらに、ExcelImport.phpのmodelメソッドに以下を追加。
    public function model(array $row)
{
return new モデル名([
‘データベースのカラム名‘=> $row[‘エクセルのカラム名‘],
]);
}
今回は、以下のようになります。
public function model(array $row)
    {
        return new ExcelData([
            //
            'name'=>$row['名前'],
            'age'=>$row['年齢'],
            'birthday'=>$row['生年月日']
        ]);
    }
6.コントローラーの設定
コントローラー用に以下のコマンドを実行。
php artisan make:controller ExcelControllerapp\ControllersにExcelControllerが作成されます。
そして、ExcelController.phpの先頭に以下を追加。
use App\Imports\ExcelImport;
use Maatwebsite\Excel\Facades\Excel;
最後に表示用・インポート用のメソッドを追加します。
//ページ表示用
    public function excel(){
        return view('excel');
    }
//ページインポート用
public function excelImport(){
//ファイルが選択されていない場合
if(request()->file('file') == false){
return back()->with('importMessage', 'ファイルを選択してください');
}
Excel::import(new ExcelImport, request()->file('file'));
return back()->with('importMessage', 'インポートが完了しました。');
}Excelをインポートしてみよう
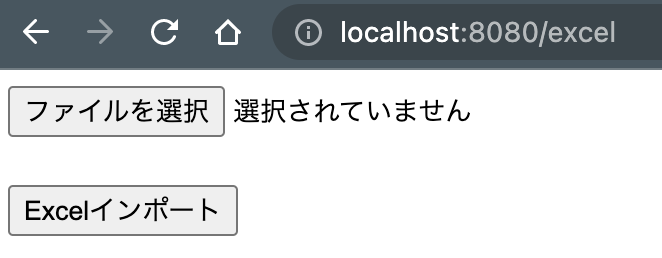
以上で準備は完了です。/excelにアクセスすると以下の画面が表示されるはずです。

無事にインポートが完了すれば、データベースにエクセルのデータが入っています。
Excelファイルのエクスポート
インポート時に作成した「ExcelData」テーブルを使ってDBに登録されているデータをエクスポートする機能を解説します。
エクスポートファイルの作成
以下コマンドでインポートファイルを作成します。
php artisan make:import ExcelExport --model=ExcelDataapp/Imports にExcelExport.phpファイルが作成されます。
ルート設定を追加
インポート時に設定したルーティングのままでOKです。
//エクセル用のルーティング
Route::get('/excel', 'App\Http\Controllers\ExcelController@excel')->name('excel');
Route::get('/excelExport', 'App\Http\Controllers\ExcelController@excelExport')->name('export');
Route::post('/excelImport',  'App\Http\Controllers\ExcelController@excelImport')->name('import');
ビューファイルを編集
resources/viewsの中にexcel.blade.php に以下のコードw追記します。
<a href="{{ route('export') }}">
    <button class="btn btn-success">Excelエクスポート</button>
</a>
@if (session('exportMessage'))
    <div class="alert alert-success text-center">
        {{ session('exportMessage') }}
    </div>
@endif
コントローラーの編集
app/Httpsの中のExcelController.phpの先頭に以下を追加。
use App\Exports\ExcelExport;
use Maatwebsite\Excel\Facades\Excel;
最後に表示用・エクスポート用のメソッドを追加します。
//ページエクスポート用
    public function excelExport(){
        $date = date('Y-m-d H:i:s');
        return Excel::download(new ExcelExport,"$date.xlsx");
    }
これで準備O K。
エクセルをエクスポートしてみよう
上記の通り実行すれば、以下のようにダウンロードできるはずです。

Excelファイルのエクスポート時に不要なカラムを削除
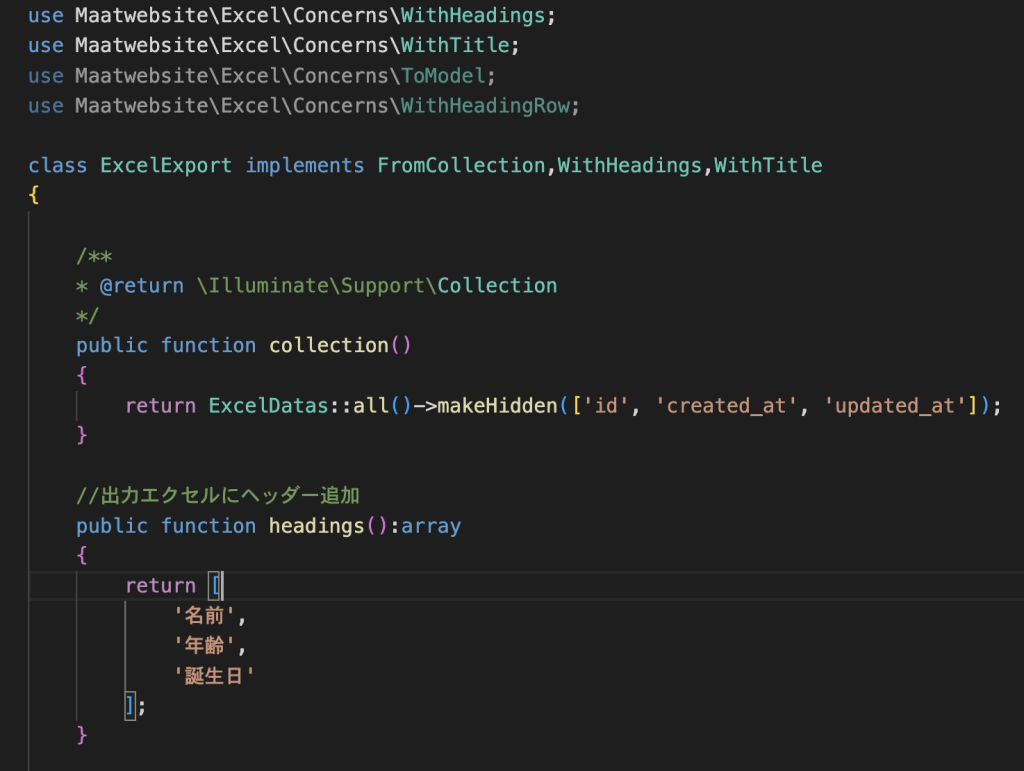
このままだとIDやTIMESTAMPSのカラムもエクスポートされるので、app/Exportsの中のExcelExport.phpファイルのcollectionメソッドにmakehiddenを追加しましょう。
    public function collection()
    {
        return ExcelDatas::all()->makeHidden(['id', 'created_at', 'updated_at']);
    }
makeHiddenメソッドは、指定したカラム名を排除することができます。
Excelファイルのエクスポート時にヘッダーをつける
できればヘッダーも付けたい方は、app/Exportsの中のExcelExport.phpファイルを開き、次のuse宣言を追記しましょう。
use Maatwebsite\Excel\Concerns\WithHeadings;Class名の末尾にも、WithHeadingsを追加します。

これでヘッダー付き、不要カラムが削除されたエクセルをエクスポートができるようになりました。


